


Leaderboard
-

strävhår
Bloggers18Poäng14 663Antal inlägg -

Jämta
Bloggers12Poäng8 443Antal inlägg -
orjant
Bloggers10Poäng7 226Antal inlägg -

hobbe
Bloggers10Poäng4 375Antal inlägg
Popular Content
Showing content with the highest reputation on 2017-12-07 in all areas
-
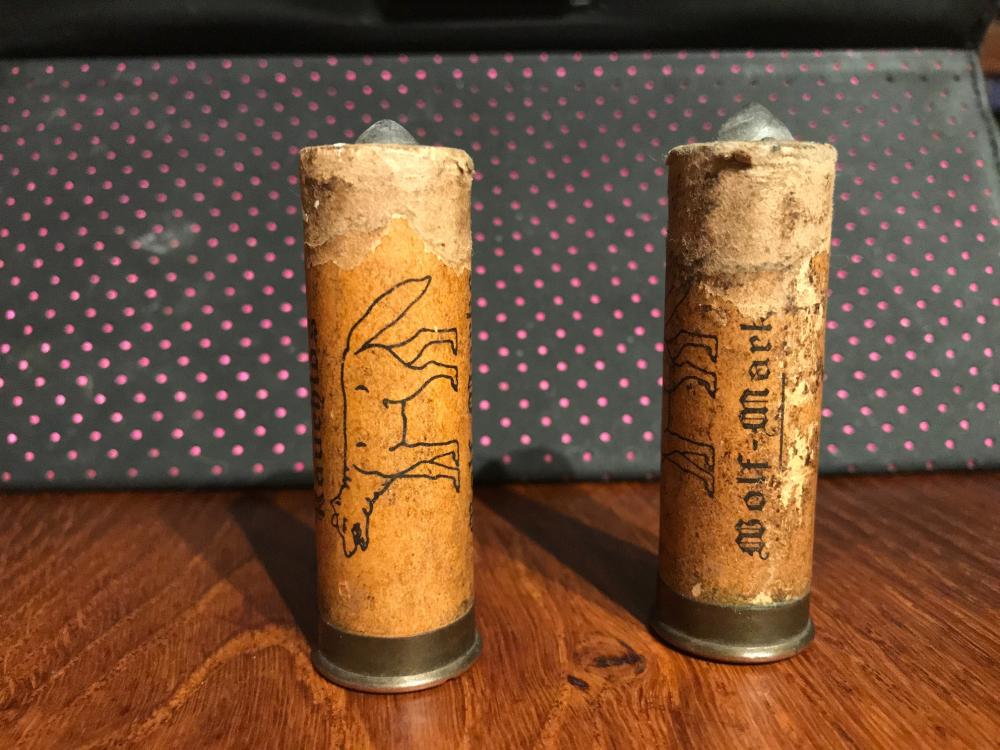
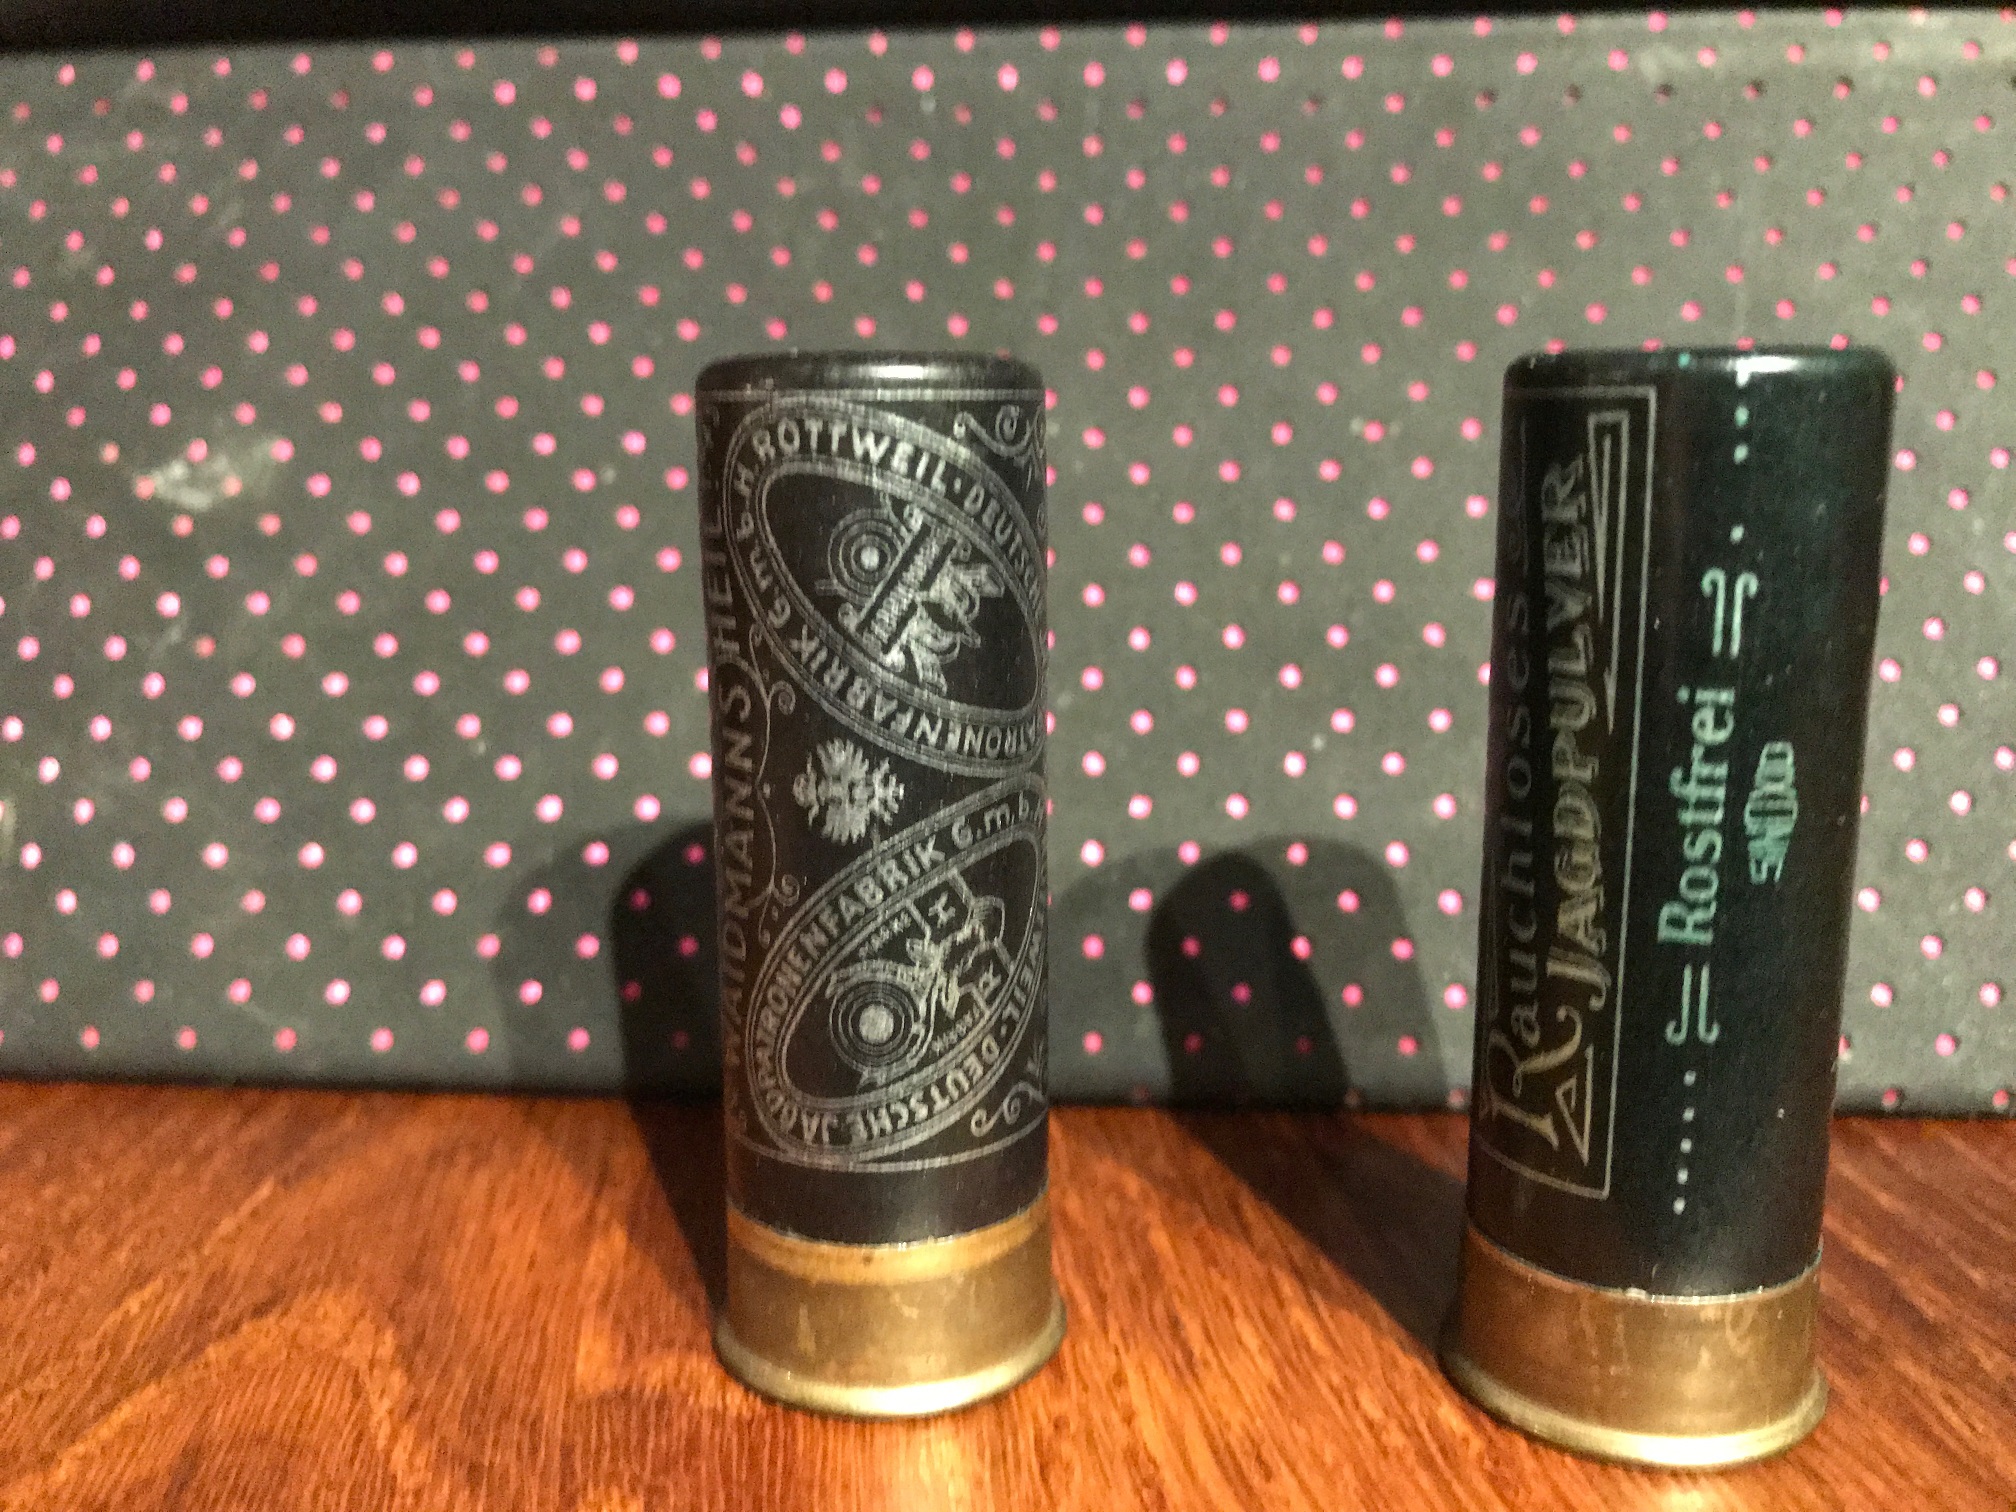
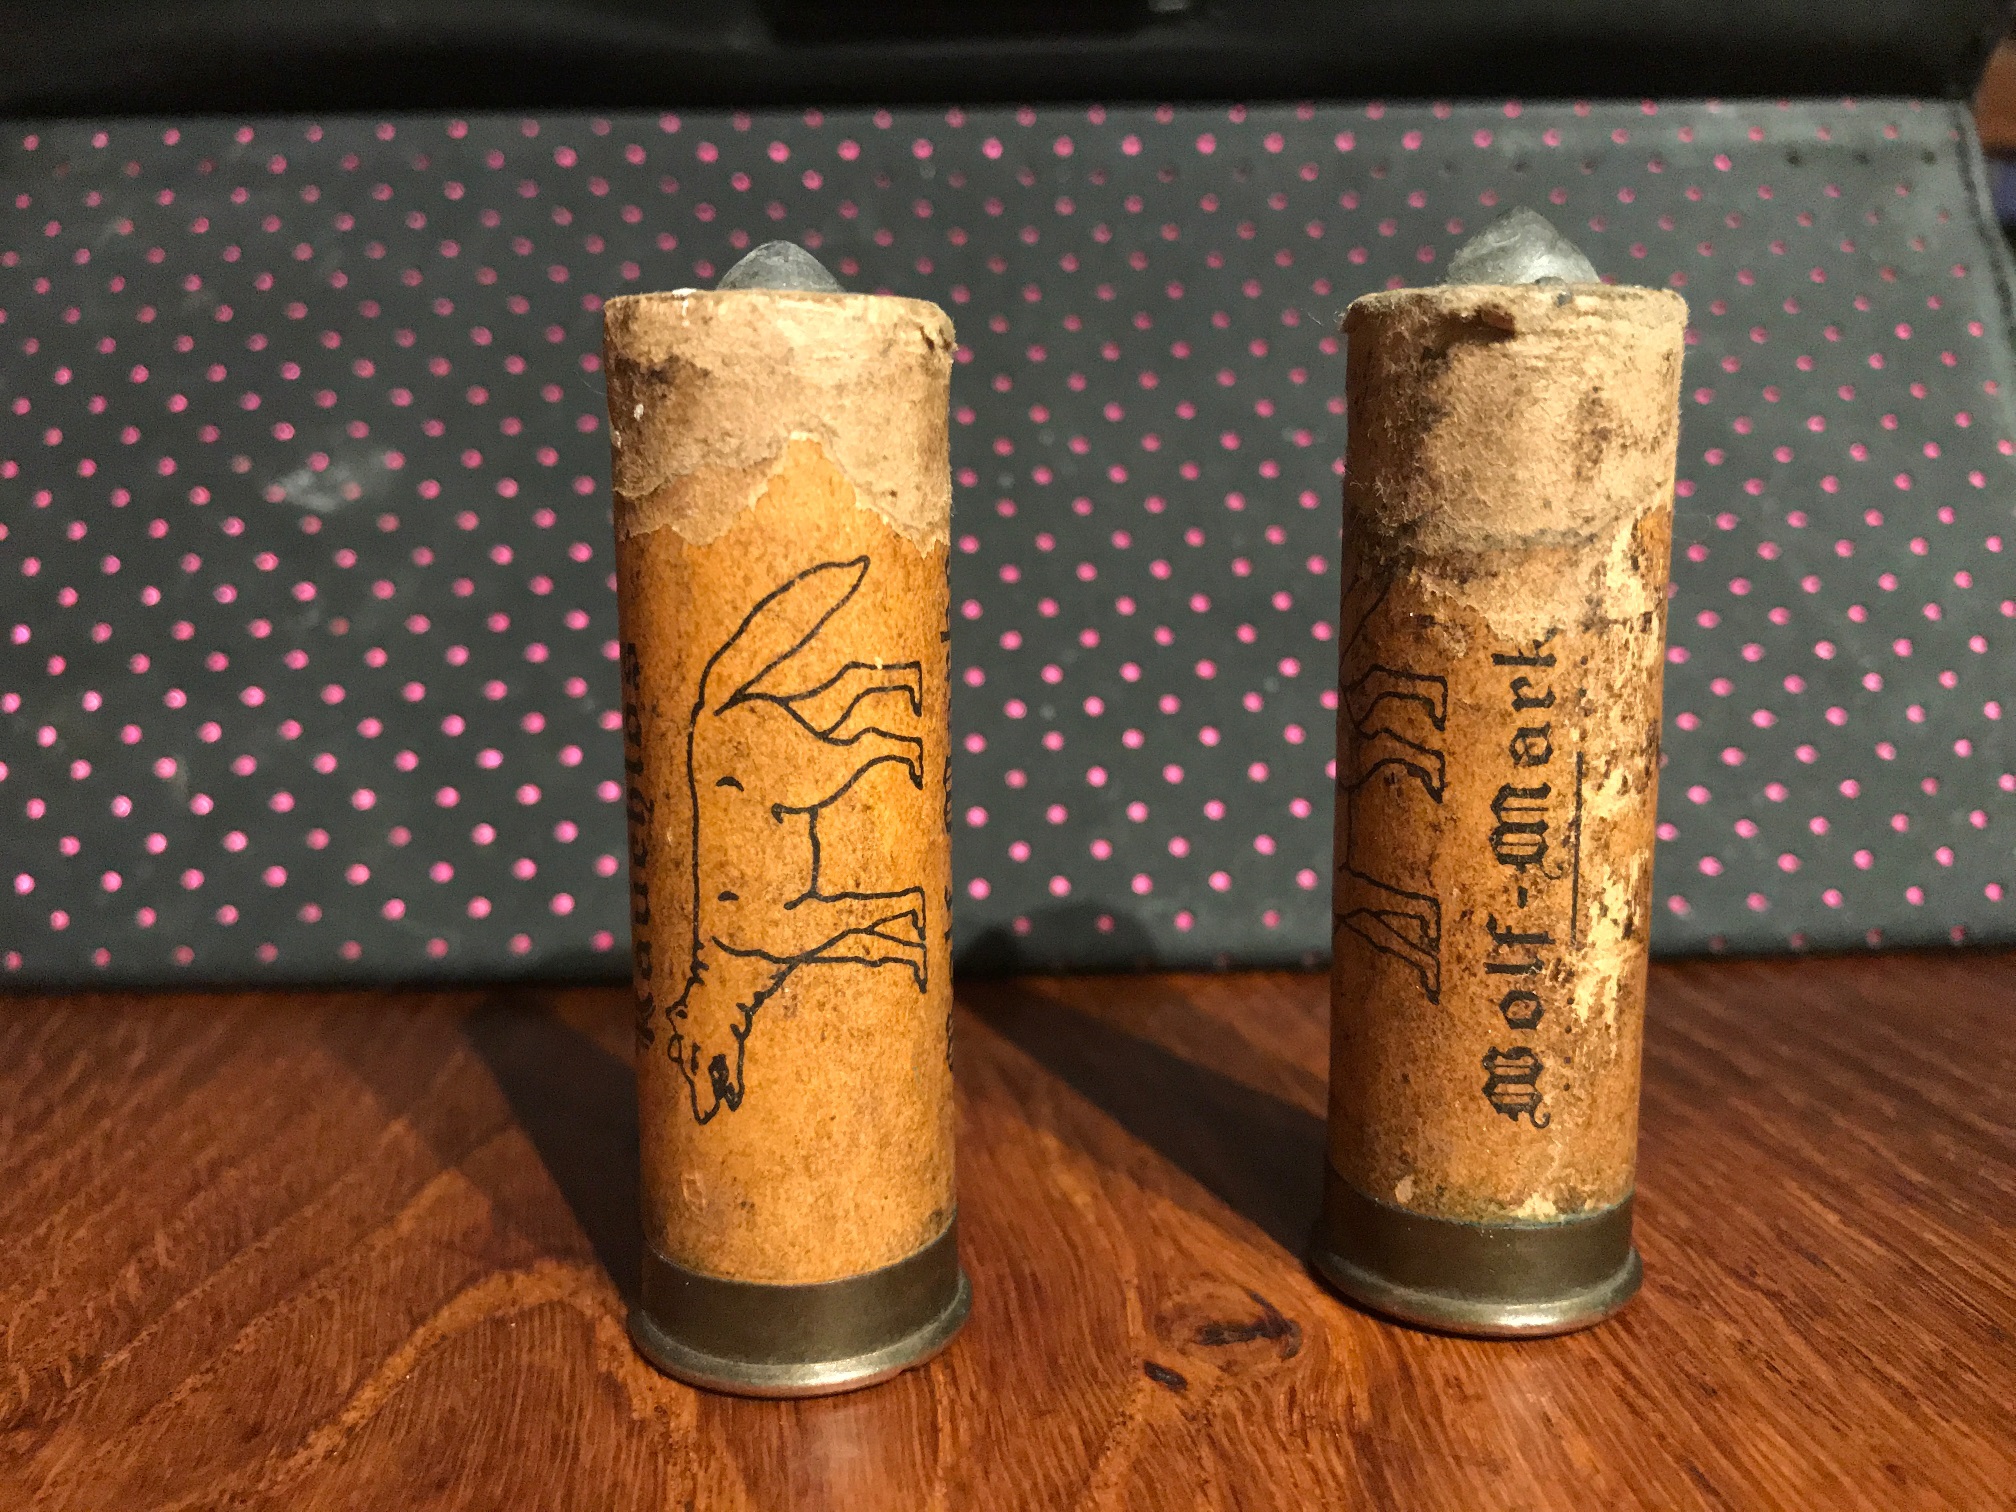
 2 pointsStädade ut farsans vapenskåp då han slutat att jaga och sålt sina vapen. Hittade några hagelskott som såg lite spännande ut, kanske någon här som vet mer om dom.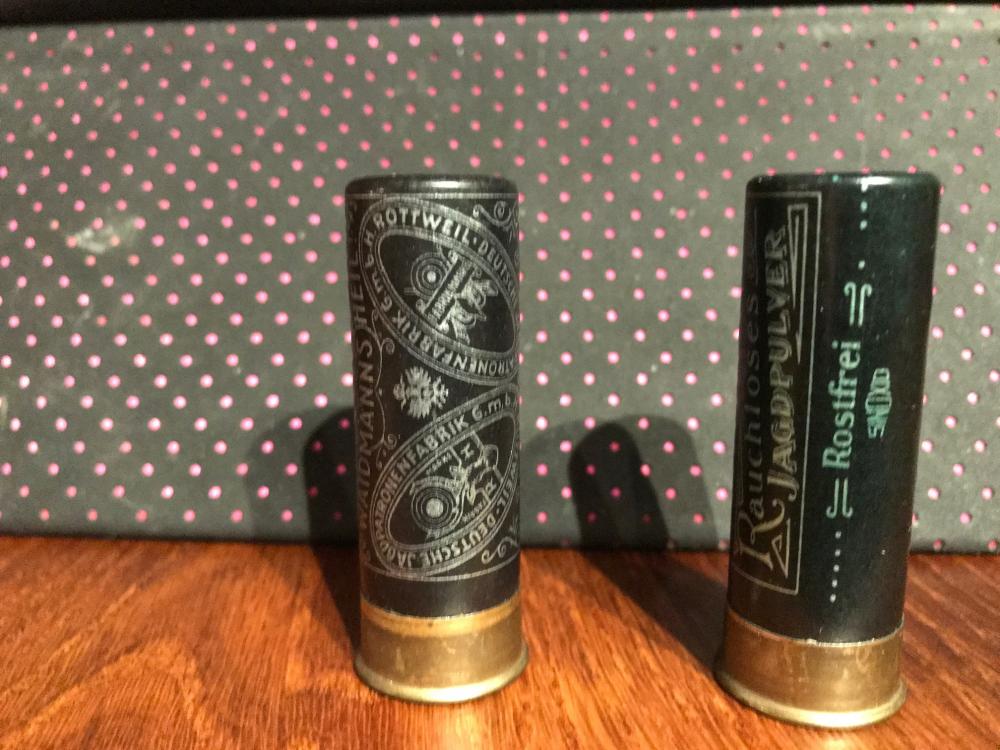
 2 points
 -
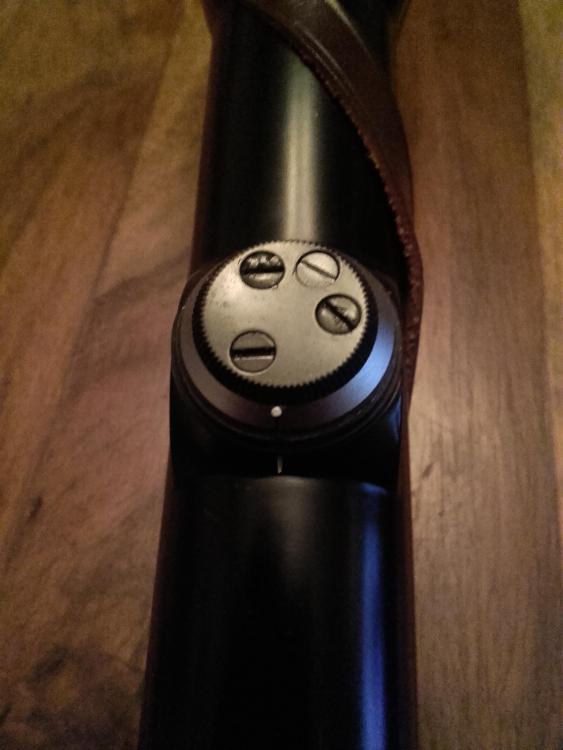
 2 pointsHittade in instruktion på utrikiska om hur justerratten är skapt på nätet, klistrar in den här då jag kan komma behöva den senare. 1. Unscrew the protective cap (1). 2. Only loosen the bright, chrome-plated screw (2). Do not loosen the three dark, painted screws (3)!) 3. Using the knurled disc (4), you can now adjust the reticle as required. To correct a high shot, turn the disk (4) counterclockwise. To correct a low shot, turn the disk (4) clockwise. 4. Re-tighten the bright screw (2); do not use force, otherwise the fine thread of the elevation adjustment will be damaged. 5. Check the point of impact. If necessary, repeat the procedure as described until the result obtained is satisfactory. 6. Loosen the three painted screws (3). Turn the graduated ring (5) until its index line is opposite the marking (6). This index allows you to make adjustments of a defined magnitude during sighting in. In addition, this index enables you to find the zero position again if, in special cases, the adjustment was changed. The index can also be used to indicate the reticle adjustments for other ranges and types of ammunition after additional markings for these ranges and types of ammunition have been provided. 7. Re-tighten the three screws (3). 8. Screw the protective cap (1) back on. Take care not to squash the rubber gasket (7)!. Adjustment range of the reticle in cm/100m ( in./100yds) at one revolution Diavari 1,5-6x42 110cm/ revolution (39 in./ revolution)2 points
 -
 2 pointsFör egen del blir det nästan alltid drillingen på hemmamarkerna i Västergötland då dessa framförallt trakterar småvilt. Drillingen är för mig primärt en hagelbössa med möjlighet att ta ett kulskott då tillfälle yppar sig..2 points
 -
 Håna gubbar och käringar på skjutbanan i all ära. Håna dom tusentals som inte ens kommer och försöker i stället. Det måste vara landslagsklass på alla skyttar här- minst- när man läser forumet. Jag ser varken kända moderatorer, forister eller vapenskribenter på tävlingar. Det borde vara som att stjäla godis från barn för er.. Kör ni med samma nick när ni ställer upp på SM / NM i viltmålsskytte? Eller vilka namn kör ni under ?2 points
 -
 1 pointJag trodde att jag lagt in bilder ifrån när jag brotchade upp min 16 pipa, men det var visst på Norska forat kammerets A5 tråd dom hamnade, sen för den som undrar så är inte städa Garaget nån av mina paradgrenar /P


 1 point
 -
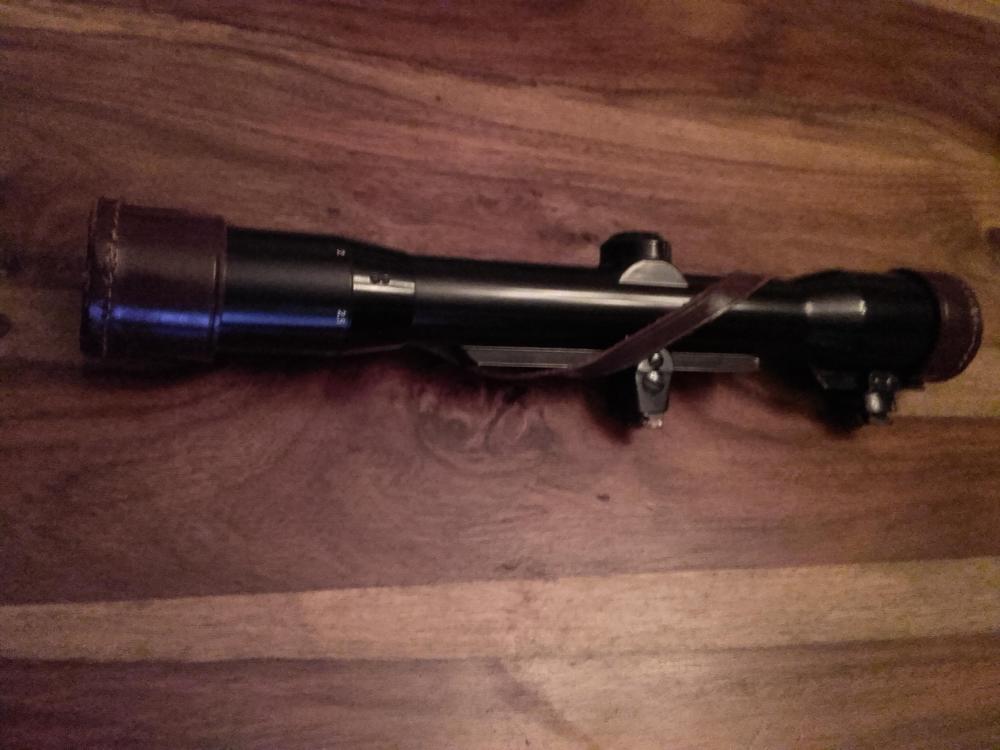
1 pointDök upp ett paket från Tyskland. Förmodligen inte många Lederhosenprydda Brattwurst-ätare som gjort sig besväret att titta genom denna av skicket att döma trots att den förmodligen är från det glada 60talet, en Hensoldt Diavari 1.5-6x36 med traditionella Tyska 1:an i så nära nyskick man kan komma med en sådan. Fantastiskt att det går att hitta en sådan gammal pjäs i det skicket fortfarande, ger en känsla välbyggdhet på ett sätt man sällan eller aldrig hittar på nyare alster. Hade sådan jäfla tur att främre haket passade med lite väl trög sugpassning får någ polera lite, även ögonavståndet verkar stämma. Bakre får jag lov att flytta lite bakåt och inpassa lite. Lite lustig höjdjusteringsratt med låsskruvar, tror att man ska släppa på den blanka vid justering, de andra om man ska "nolla" skalan...kanske. Träffläge i sidled justerar man med det bakre hakmontaget. Ska bli spännande att provtitta i glaset när det blir ljust ute, känner mig förhoppningsfull att den är riktigt skarp.....Vi får se vad det lider.
 1 point
 -
 1 pointDagens Lunch: Stekt fläsk, kokpärer och löksås. Min favorit MIddag: Kyckling mangochutney gryta och ris. /Willy1 point
 -
 1 point
 -
Det är nog inte så att ingen vet hur man fixar det, men de som har behörighet att rota under huven är inte vi vanliga moddar, utan enbart de röda och de är inte här på daglig bas, men de är notifierade om problemet.1 point
-
 1 pointHittade rabarber i frysen så det blev rabarberpaj till efterrätt "you did quite well" enligt dotter när hon tog om Det blev till att provsmaka kallrökt älghjärta som jag har haft i röken sen i lördags j**lar vad gott det blev1 point
 -
 Testa att ta bort align="center" i DIVen i ipsLayout_mainArea/elContent...1 point
 -
 1 pointDags för ett nytt filmklipp, älgjakt med jämthund. Har verkligen jobbat mycket med denna film för att få det så bra som möjligt. Hoppas att ni gillar den, mycket nöje allihopa. Ni hittar mig på snapchat, instagram och naturligtvis här på facebook. Glömde lägga till1 point
 -
 Vet ej om jag räknas som känd forumist men tävlar gör jag. Skjuter Jägarduvor för träningen och mälarcup ll-test för tävlingen. Använder dock inte mitt nick utan mitt namn. Hånat någon som är på banan är inget man ska göra däremot blir jag förbannad på folk som inte ens försöker utan redan bestämt sig att dom inte kommer att träffa. Kenneth Smedberg.1 point
 -
 Ja det är omöjligt att få med folk till banan. "inte tid" "skjuta kan jag" "skjutit så mycket i mina dagar" "för dyrt"......bäst av alla är " går inte bra på bana, men i skogen då kan jag". Vet ett lag som har blyprov dagen innan första jaktdagen på älg, då måste skytten med det vapen och ammo han avser bruka, från bänk skjuta 3 jaktskott och sätta dom inom en 15cm cirkel @100m. Detta är utöver krav på godkänd älgbana, men de har det då många gör just så att de skjuter med en bössa (6,5) på älgbanan sen kommer de till skogen med en helt annan bössa. Jaktledaren tröttnade på skadeskjutningar pga inte inskjutna vapen och skyttar som aldrig testat med den bössa de använder vid jakten. De får mata jaktskott tills de klarar av att få in 3 skott i cirkeln, inte totalt utan 1 serie är 3 skott, missas 1 får de ny tavla och skjuta 3 smällar på igen. Inte supermycket till krav, men mycket bättre än inget iaf.1 point
 -
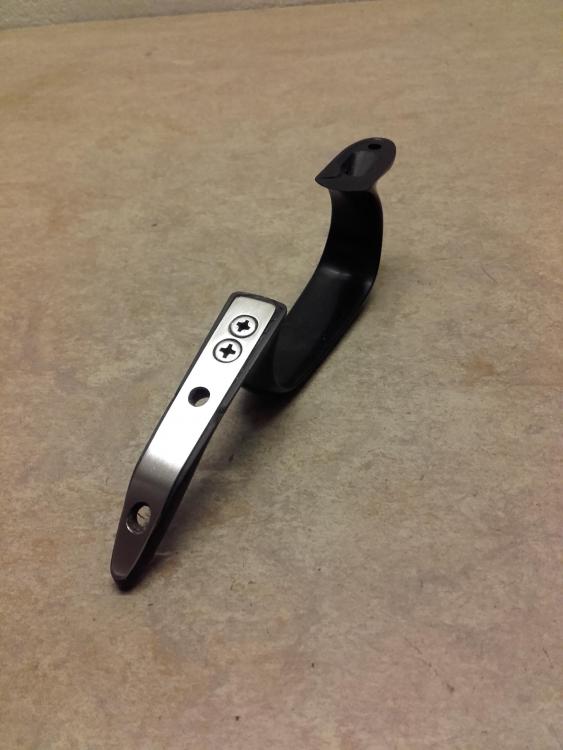
1 pointPust och stön, fula gjutskarver och smårepor bortslipade. Polerat med våtslippapper, Scottebrite och sedan trasa med Autosol och sist Pool polermedel. Ett jävla gnuggade men nu börjar den se förhållandevis respektabel ut. Blir nog förstocken som står härnäst på tur för en omgång, sen ska stocken slipas och bonas, sen baskylen putsas och rengöras in och utvärtes, sen Hensoldt sikte och ev även Aimpoint Micro med hakmontage inpassas, sen..... Notera att Philips-skruvarna är närpå dragna på streck, det är ju trots allt en Drilling med gammla anor.....från -67 ta mig fan.


 1 point
 -
1 pointDet skulle vara kul om dom, för att larva sig lite, hade filmer med scener från Jurassic Park med anfallande Tyrannosaurus Rex med höga vrål och tunga dunk från tramp i marken Det vore lite att skjuta på........1 point
-
1 point
-
 Personligen så tycker jag att en av de viktigaste sakerna i det här med att skjuta på pappälgen är att lära sig sina gränser vad det gäller skytte på löpande vilt. Tyvärr så är minnet oerhört kort eller helt obefintligt hos jävligt många, vilket tyvärr mycket ofta visar sig i skogen. Skyttet på framför allt räv är bedrövligt och det börjar sorglit nog även bli katastrofalt dåligt på grisarna de senaste åren.0 points


This leaderboard is set to Stockholm/GMT+02:00